
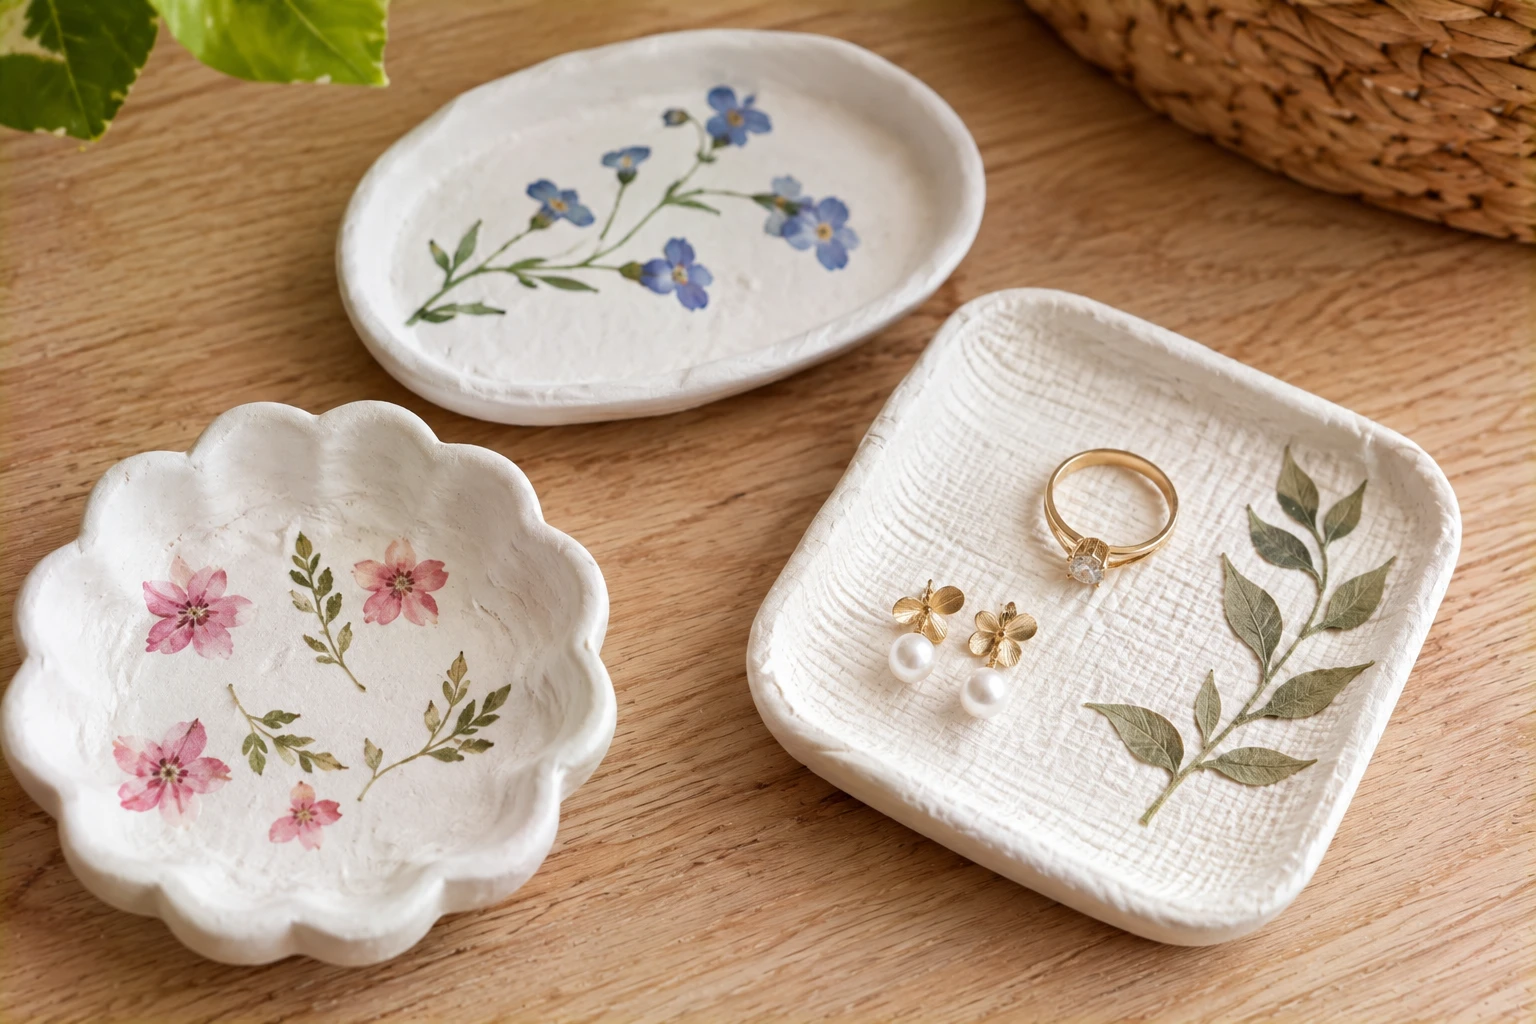
If you’re new to clay, start with a trinket dish. It’s small, it’s forgiving and it has a real job once it’s done: holding a ring by your bed, a pair of earrings or the loose clips on your desk. These easy air dry clay crafts give you three looks from the same basic slab, with no kiln or pottery wheel needed.
Keep these dishes decorative and dry. Air dry clay isn’t food safe or waterproof, even when painted and sealed, so don’t use it for food, drinks, soap, plants or candles. Plan it for jewelry and other light, dry objects.
This article contains affiliate links. As an Amazon Associate I earn from qualifying purchases.
What you need
For beginners, I’d go with a white clay so you can paint it any color later. DAS white air-hardening clay (paid link) is a popular choice for projects like these. Follow the package instructions for working, drying and storage. You’ll also need:
- A smooth work surface such as a canvas mat, parchment paper or a silicone sheet.
- A rolling pin and two wooden strips about 1/4 inch (6 mm) thick to use as rolling guides.
- A blunt craft knife or clay tool and a paper template.
- A small cup of water and a soft brush or sponge.
- Fine sandpaper (around 220 grit), acrylic paint and an optional water-based sealer.
Keep tools you use for clay separate from food prep tools.
Prepare one even slab
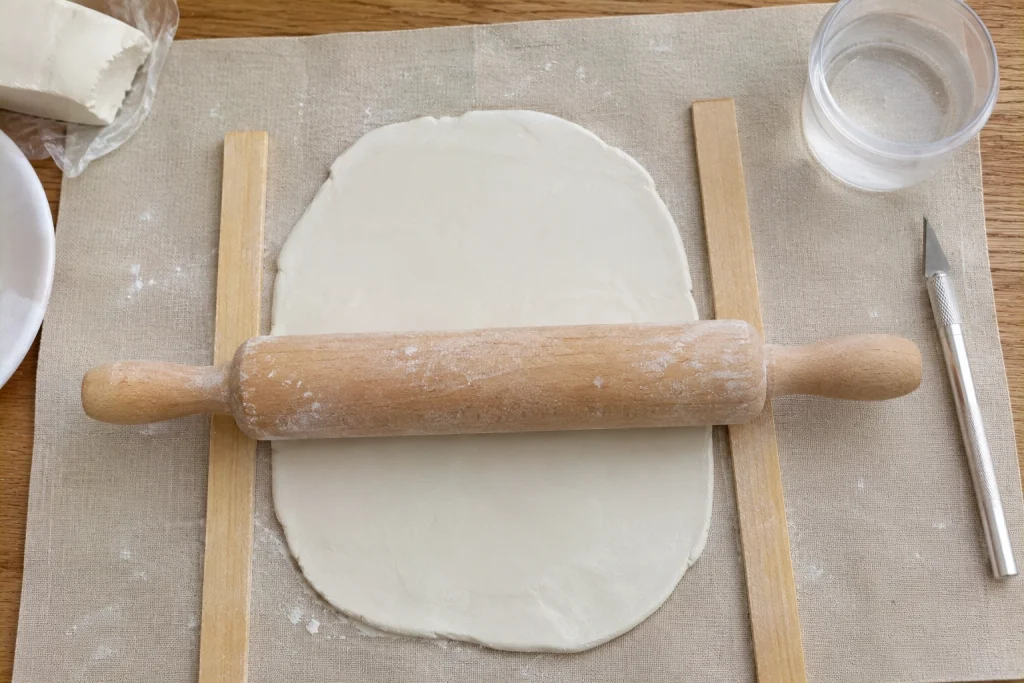
Knead a piece about the size of a tennis ball for a minute or two until it’s smooth and warm. Place the guide strips on either side and roll the clay between them so the rolling pin rests on the strips. That gives you an even slab about 1/4 inch (6 mm) thick all over.
If you remember one thing from this post, make it this: even thickness matters more than anything else. A thick center and thin edges dry at different speeds, which leads to warping and cracks. Smooth small surface marks with a barely damp fingertip; too much water makes the clay sticky and weak. Wrap leftover clay tightly in plastic or put it back in its packaging so it doesn’t dry out while you work.
Make a template for the first dish
Draw an oval about 4 inches long and 3 inches wide (10 x 7.5 cm) on scrap paper and cut it out. Place your ring or earrings inside to make sure it suits what you’ll keep in it. Save the template and note what worked, so your next dish is easier to repeat.
1. Make a simple oval ring dish
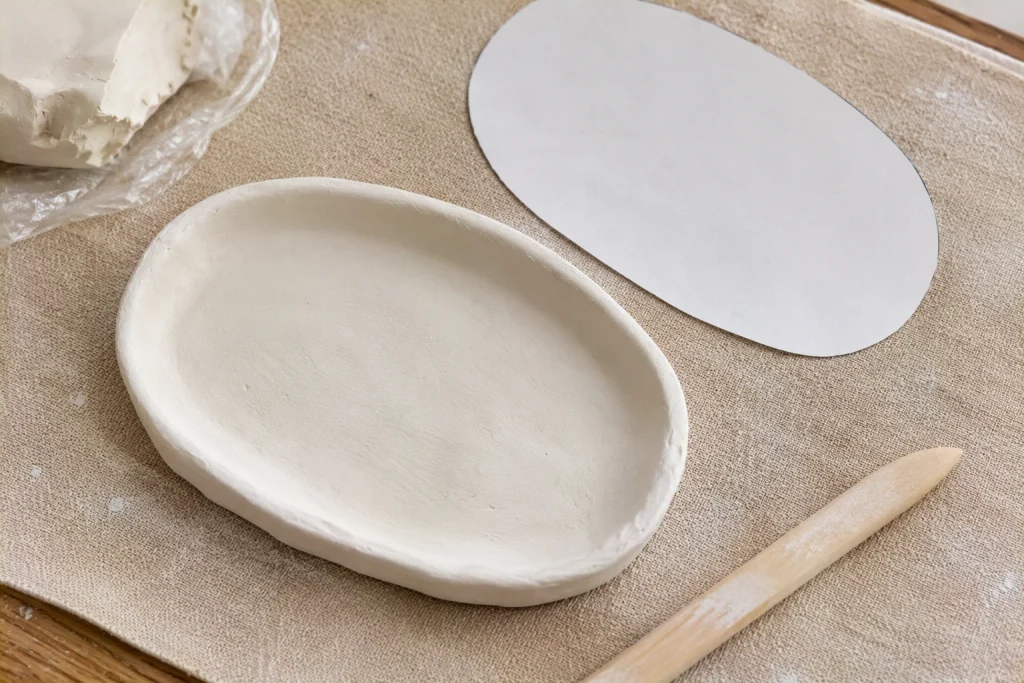
Lay the template on the slab and cut around it with a blunt tool, holding the blade straight up. Peel away the extra clay and smooth the cut edge with a damp fingertip.
Gently lift the edge all the way around to form a shallow rim, about 1/2 inch (1.2 cm) high. A ring dish doesn’t need deep walls, and a low rim is easier to shape evenly and less likely to slump. To support the curve while it dries, rest the dish inside a shallow bowl lined with plastic wrap, or prop the rim with small rolls of paper towel. Check that the base sits flat and doesn’t rock.
For a minimal look, leave the clay white and paint a thin gold or terracotta line along the rim once it’s fully dry.
2. Give a round dish a soft scalloped edge
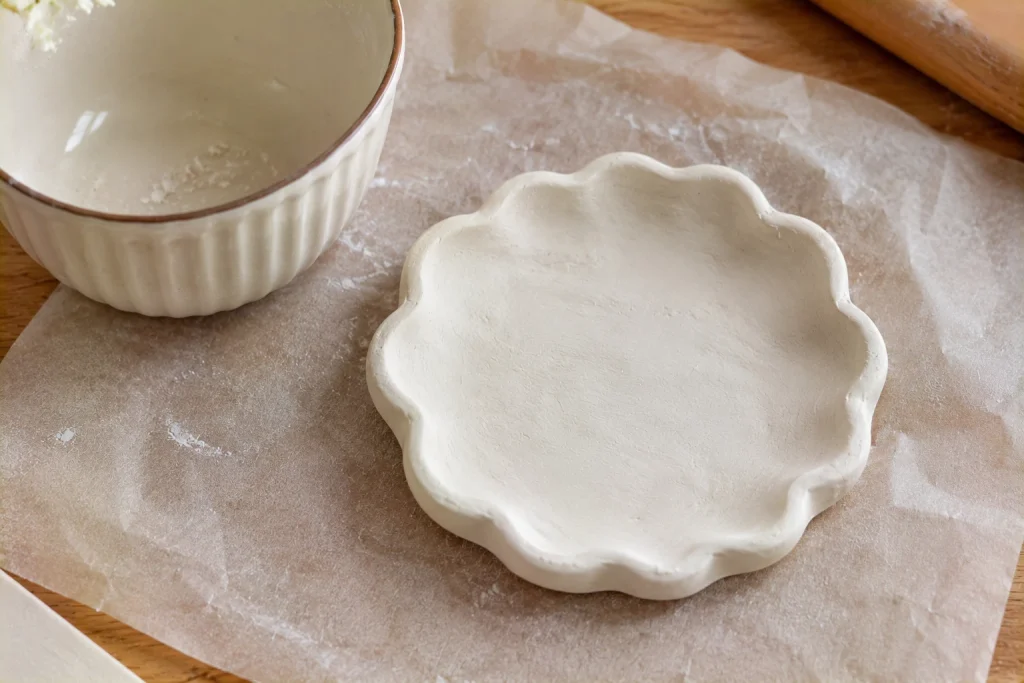
Cut a circle about 3.5 inches (9 cm) across using a small bowl or lid as a guide. Mark six or eight evenly spaced points around the edge with a toothpick. Between each pair of points, push the rim gently outward with a fingertip to make a soft wave, then raise the edge slightly.
Work around the whole circle slowly so one side doesn’t end up higher than the other. If the clay starts to crack, stop pulling and smooth the area. A little slip, clay mixed with water into a paste, fills small cracks while the piece is still soft.
In my opinion, a single pale color suits a scalloped dish best, since it makes small irregularities look softer. Apple Barrel white acrylic craft paint (paid link) is one option for a white finish on fully dried clay. Other colors need their own paint, and paint alone doesn’t waterproof the dish. For more pattern ideas, these painted terracotta patterns include bands, stripes and dots that work on clay too.
3. Press a gentle texture into a small square dish
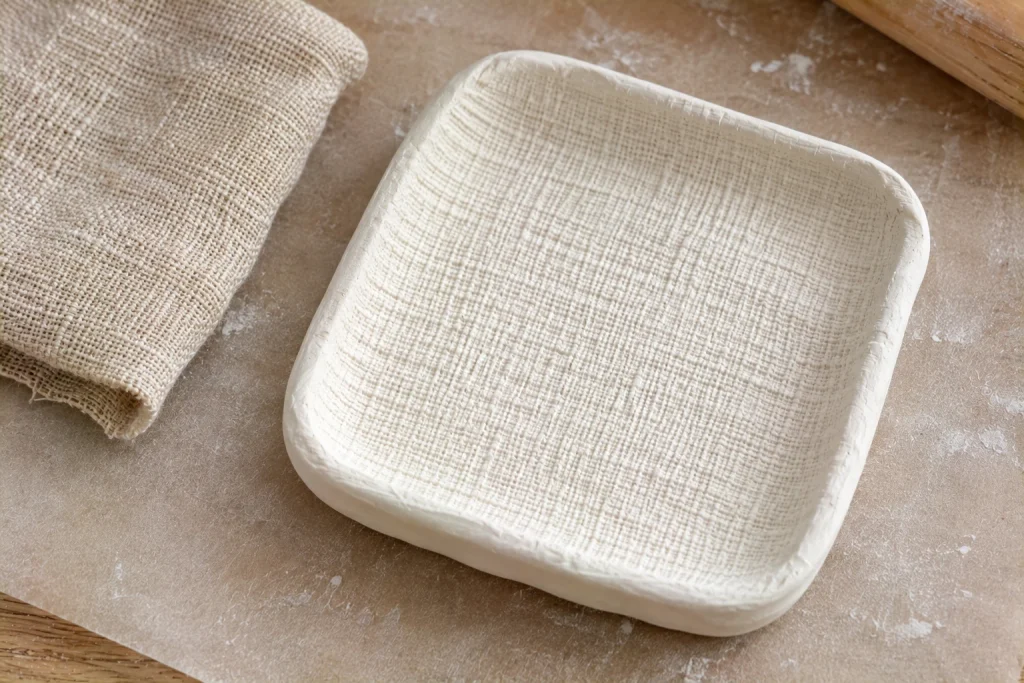
Cut a square about 3 inches (7.5 cm) wide with rounded corners. Rounded corners are easier to shape and less likely to chip. Before lifting the edges, lay a piece of textured fabric such as linen or lace on the surface and roll over it once with light pressure, then peel it off slowly.
Test the pressure on a scrap first. The texture should sit on the surface, not thin the base. Then turn the edges up slightly and check the corners; if one folds into a lump, reshape it while the clay is still soft.
Dry slowly before painting
Set the dishes somewhere they won’t be moved, away from direct heat and sunlight. Drying usually takes 24 to 72 hours depending on thickness and humidity, and thicker pieces take longer. Waiting is the hardest part, but don’t speed it up with an oven, hair dryer or heater unless the clay’s instructions allow it; fast drying leaves a dry-looking surface over a damp middle and causes cracks.
Once the dishes are firm enough to handle, after about a day, flip them over so the bottoms dry evenly. Handle the whole base rather than lifting by the rim. The clay is fully dry when it feels room temperature, not cool, and looks evenly pale all over.
Sand, paint and seal

Lightly sand rough edges with fine sandpaper. Work outdoors or over a damp paper towel, wear a dust mask and wipe away dust with a barely damp cloth. Never sand near food.
Apply paint in thin coats and let each dry before adding the next; thick paint fills texture and looks lumpy. A water-based sealer adds some protection from handling and light moisture, but it doesn’t make the dish waterproof or food safe.
Fix the common problems in your next batch
| Problem | Likely cause | Next time |
|---|---|---|
| Dish rocks on the table | Base warped while drying | Use a flatter shape and flip it halfway through drying |
| Cracked rim | Edges too thin or dried too fast | Keep a lower, thicker rim and dry away from heat |
| Hairline cracks on the surface | Too much water or uneven drying | Smooth with less water; fill cracks with slip when soft |
| Texture looks faint | Too little pressure | Roll the fabric once with firmer, even pressure |
Use finished dishes in dry spots and dust them gently. If you only make one, make the oval. It’s the most forgiving shape and the most useful dish of the three. For another small gift project, this beginner beaded bag charm uses a short strand and a removable ring.