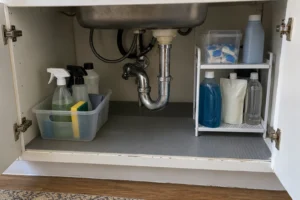

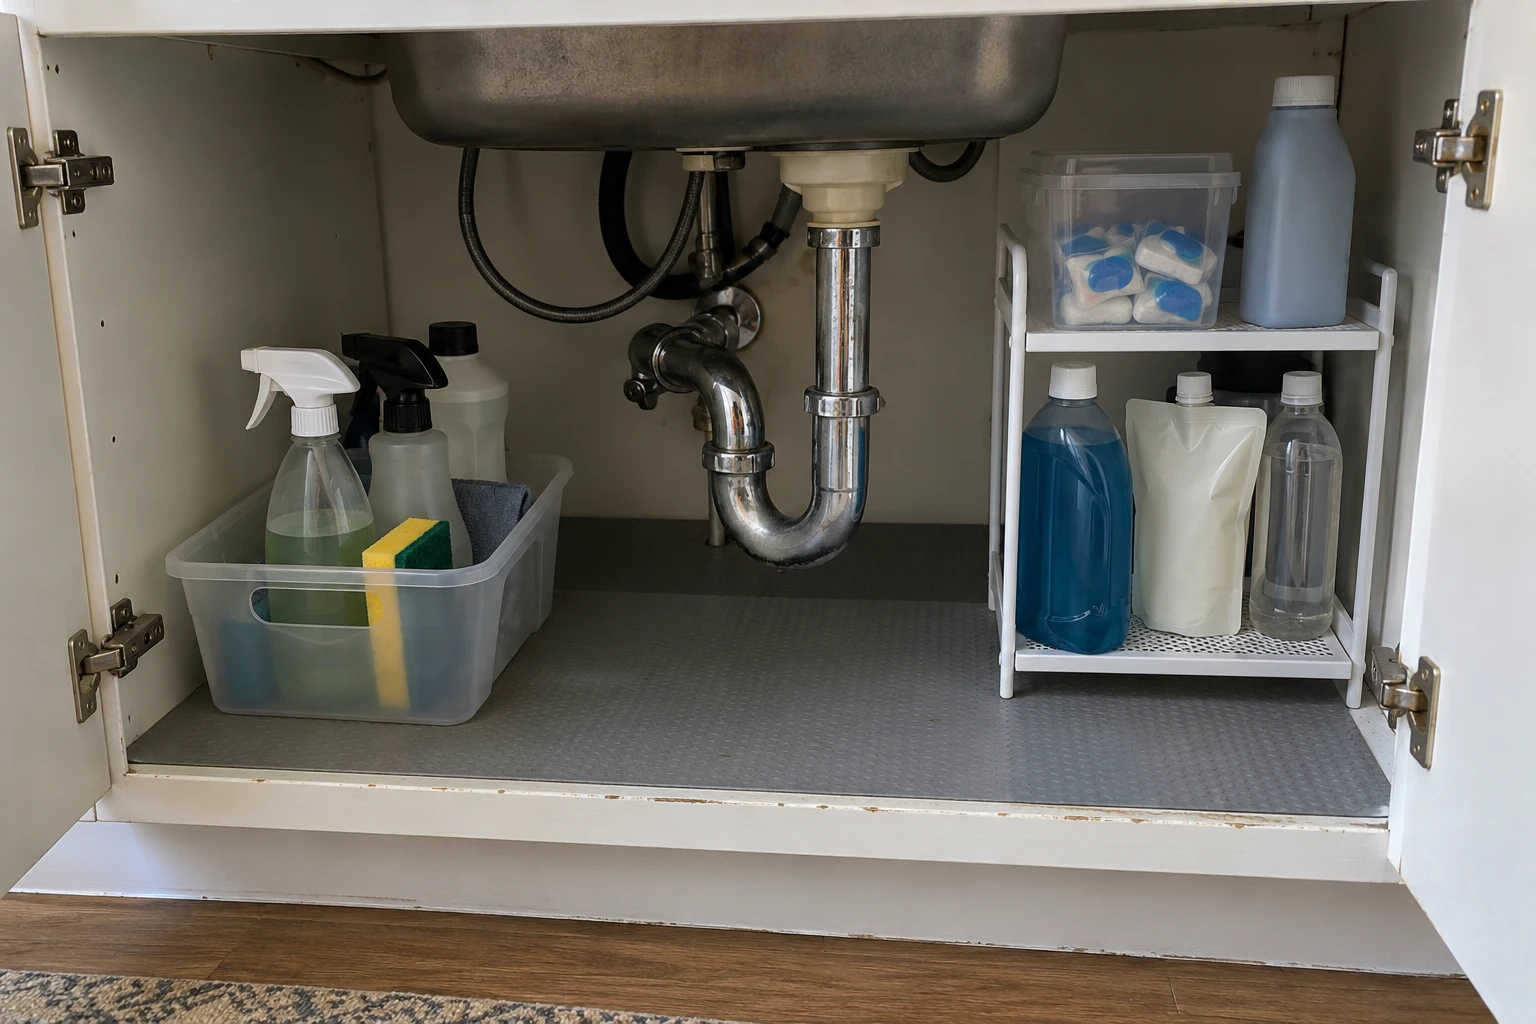
The cabinet under a kitchen sink is one of the most awkward storage spaces in a home. A drainpipe runs through the middle, the water shut-off valves sit at the back, a garbage disposal may take up half the height, and the floor is the first place a slow leak shows up. Most under-sink organization ideas fail because they ignore all of that and treat the cabinet like an empty box.
These seven ideas start with the pipes and work outward. The goal is a cabinet where cleaning supplies are easy to grab, the valves are easy to reach in an emergency, and a drip gets noticed in days rather than months.
A quick safety note first: if young children live in or visit your home, cleaning products are safer in a high cabinet or behind a child-safety latch. Keep every product in its original, labeled container.
Measure before you buy anything
Under-sink organizers are sold in standard sizes, but sink cabinets are not standard. Five minutes with a tape measure prevents the most common mistake: buying an organizer that fits the cabinet but will not pass through the door opening, or one that hits the trap (the U-shaped section of the drainpipe).
| What to measure | Why it matters |
|---|---|
| Width of the door opening | The opening is often narrower than the inside of the cabinet because of the frame. Organizers have to fit through it. |
| Inside depth, front to back wall | Pull-out bins and drawers need almost the full depth, minus room for pipes at the back. |
| Cabinet floor to the bottom of the trap | Anything that sits under the trap must be shorter than this height. |
| Each side wall to the drainpipe | This is your usable width on the left and the right. |
| Where the shut-off valves are | You will keep a clear path to them, so note their position. |
Write the numbers on a quick sketch and take a phone photo of the open cabinet. Having both with you in a store or while shopping online makes it much easier to rule things out.
1. Keep a clear path to the shut-off valves
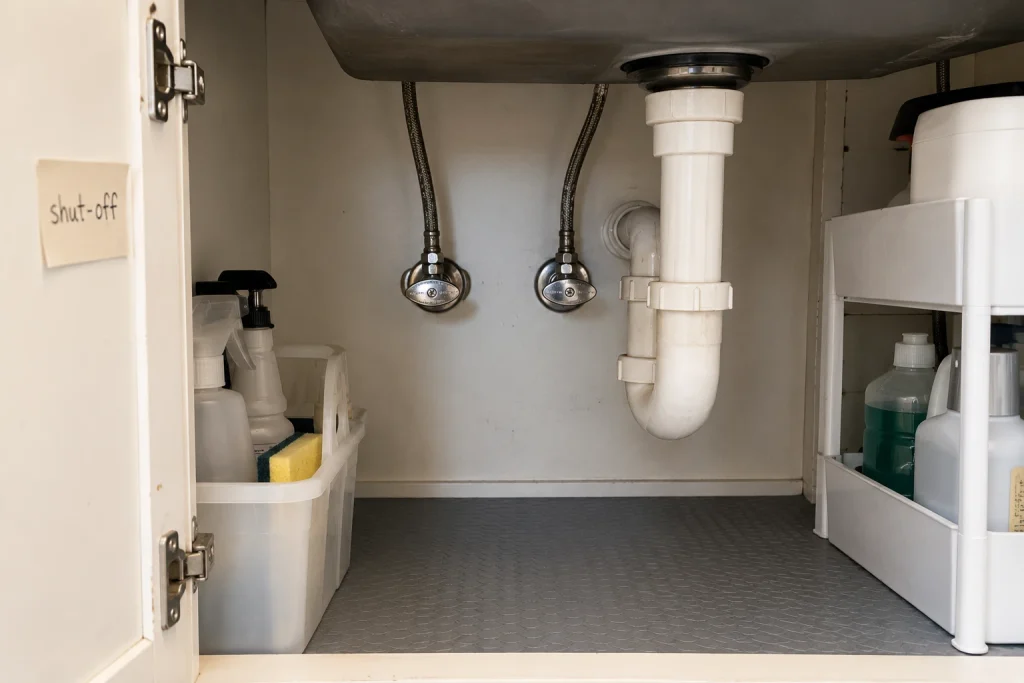
If a pipe or tap starts leaking, the valves under the sink are how you stop the water quickly. That only works if you can reach them without unpacking the cabinet first. Treat the area directly in front of the valves as a no-storage zone, even if it looks like wasted space.
While the cabinet is empty, find out which valve controls hot water and which controls cold. A small label on the inside of the door, such as “Water shut-off: back left,” helps anyone in the household in a hurry. If a valve is stiff, corroded, or already dripping, do not force it. That is a job for a plumber.
2. Line the cabinet floor with a waterproof liner
The base of many sink cabinets is particleboard, which swells and crumbles once it gets wet. A waterproof liner protects it and catches small drips before they reach the wood. Look for a rubber or plastic liner that can be trimmed to size, ideally one with a raised edge that holds a small amount of water.
A light-colored liner makes drips easy to see. Avoid absorbent fabric mats here: they soak up water quietly and can hide a leak until there is damage underneath.
3. Use split storage on both sides of the pipe
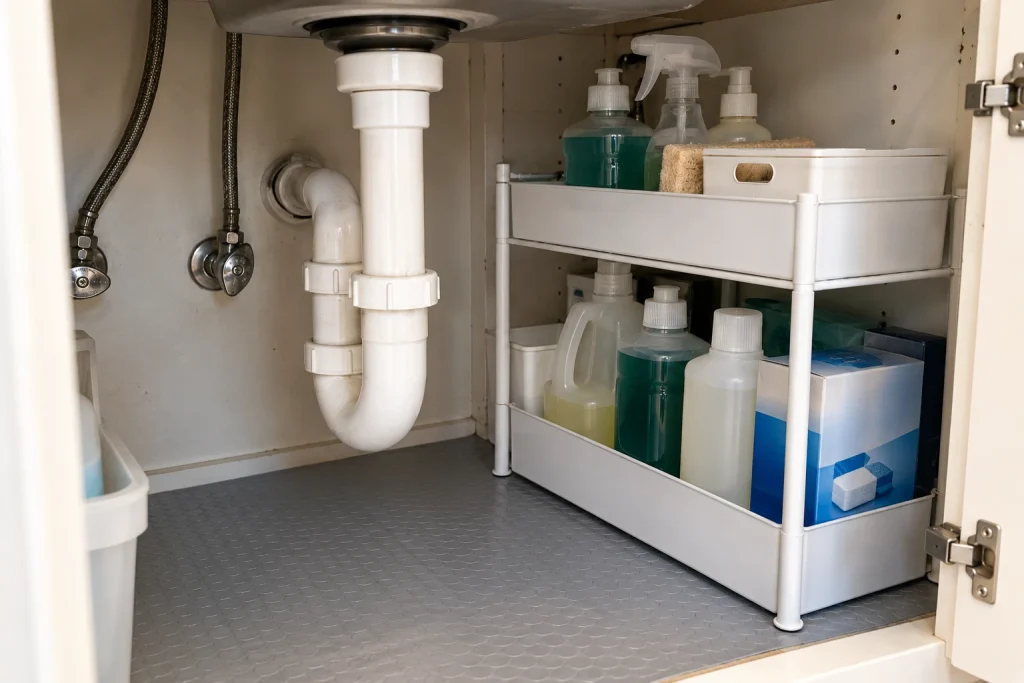
One wide organizer rarely works around a drainpipe. Two narrow ones, one on each side, usually fit much better and leave the center open for the pipe. Use your side-wall-to-pipe measurements to choose them.
A two-tier shelf can double the usable space on one side if the height under the trap allows it. Some expandable under-sink shelves have removable sections so the shelf can wrap around the pipe. Check the height of the top tier against your trap measurement before you buy, and allow a little extra room so bottles can be lifted out without tipping.
4. Group supplies by task in carry caddies
Instead of sorting by product type, sort by the job you do with it. A useful set for most kitchens:
- Dishes: dish soap refill, dishwasher detergent, rinse aid, a spare sponge.
- Surfaces: all-purpose spray, glass cleaner, microfiber cloths.
- Floors: floor cleaner and a scrub brush.
- Backups: unopened refills, kept at the back.
A caddy with a handle lets you carry a whole job to the bathroom or the table at once, and it slides out of the cabinet in one move. Put tall bottles at the back, things you use daily at the front, and stop filling a caddy once you can no longer see every label.
5. Use the inside of the door, carefully
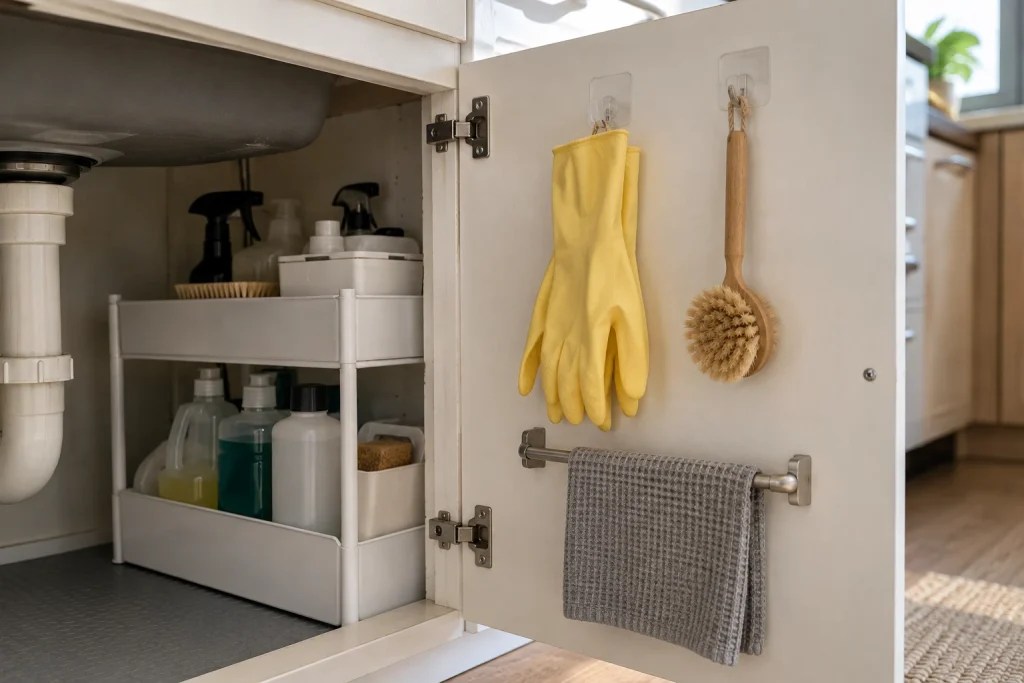
The back of the cabinet door is good for light, flat things: rubber gloves, a dish brush, a folded cloth, or a roll of small trash bags. Adhesive hooks or a slim over-the-door rack both work.
Before you attach anything, close the door slowly and check the gap between the door and whatever sits inside the cabinet. A hook that hits a bottle every time the door closes will not last. Keep heavy items off the door, and check the weight rating on adhesive hooks, since cabinet doors are often too thin for screws.
6. Hang spray bottles from a tension rod
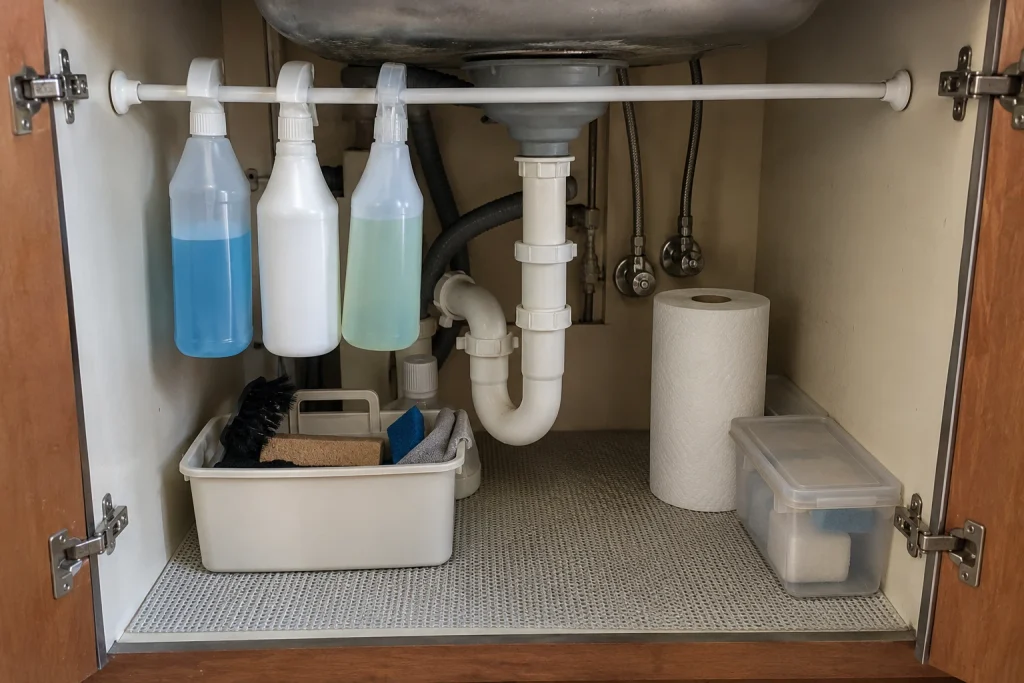
Spray bottles take up a lot of floor space for what they hold. A tension rod fitted across the upper part of the cabinet lets you hang them by their triggers instead, which frees the floor for bins and caddies.
This works best when the rod can sit above the trap without pressing on any pipe. Choose a rod rated for the width of your cabinet, twist it firmly into place, and hang only a few bottles to start. If the rod slips, try a different height where the side walls are flat.
7. Keep only what belongs under the sink
The space under a sink fills up with things that have nowhere else to go: spare paper towels, rarely used vases, pet food, plastic bags. Moisture and occasional pests make it a poor place for paper, food, and anything you want to keep dry. A simple rule helps: if it is not used at the sink or for cleaning the kitchen, it lives somewhere else.
Store bleach separately from products that contain ammonia or acids, such as some glass cleaners and descalers. Mixing them can release dangerous fumes, and a cramped cabinet makes spills more likely. Never pour cleaners into unlabeled bottles.
A five-minute monthly check
Once the cabinet is organized, a short monthly routine keeps it working and catches problems early:
- Lift the liner and look for water marks or swelling underneath.
- Run your hand along the trap joints and around the valves to feel for dampness.
- Throw away empty bottles and anything that has separated or leaked.
- Wipe the liner and put everything back in its group.
- Make sure the path to the valves is still clear.
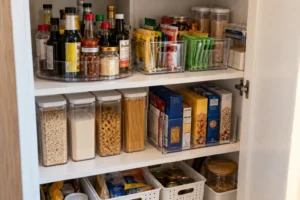
If you are organizing the rest of the kitchen too, these small pantry organization ideas and kitchen counter organization ideas use the same approach: start with how you actually use the space, then add storage only where it solves a real problem.