
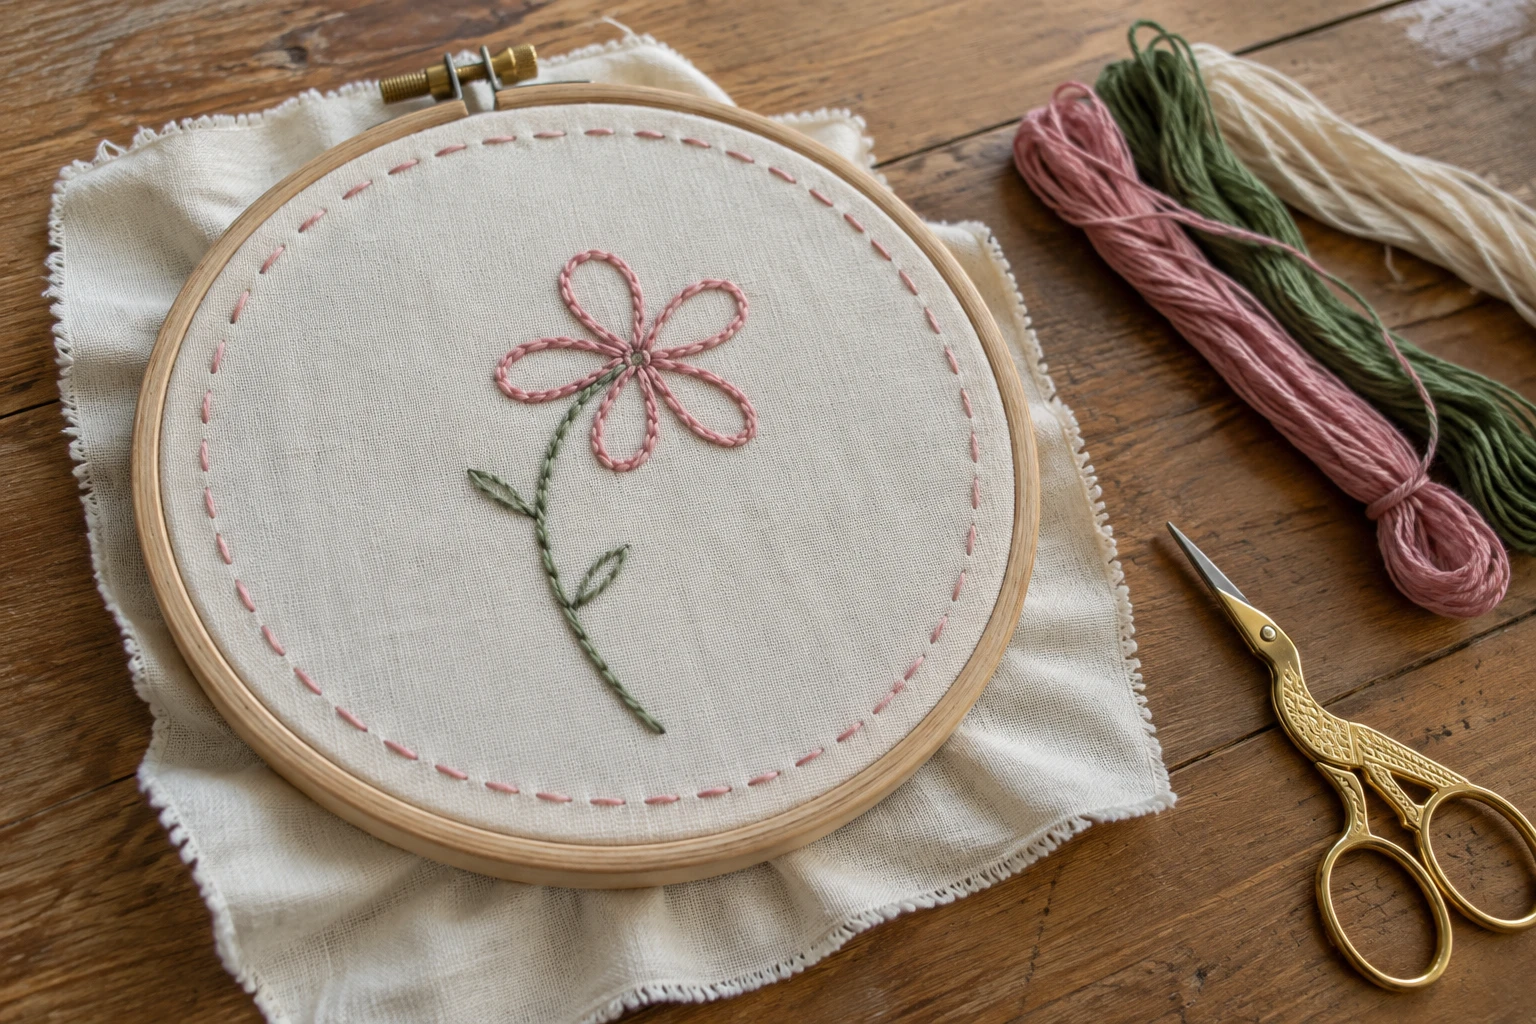
Skip the big floral kit for now. Hand embroidery for beginners goes much better when the first project is small enough to finish in an evening or two, like this simple sampler: a dashed border, a curved stem and a few looped petals. You’ll learn three stitches that show up in almost every pattern, and you’ll end up with something you can hang in its hoop.
Choose a plain, stable woven fabric for the first attempt. Stretchy jersey, loose gauze and thick denim all add challenges before you’ve learned how the needle and thread behave. A clean cotton scrap works well if it’s large enough for your hoop.
This article contains affiliate links. As an Amazon Associate I earn from qualifying purchases.
Gather a small kit
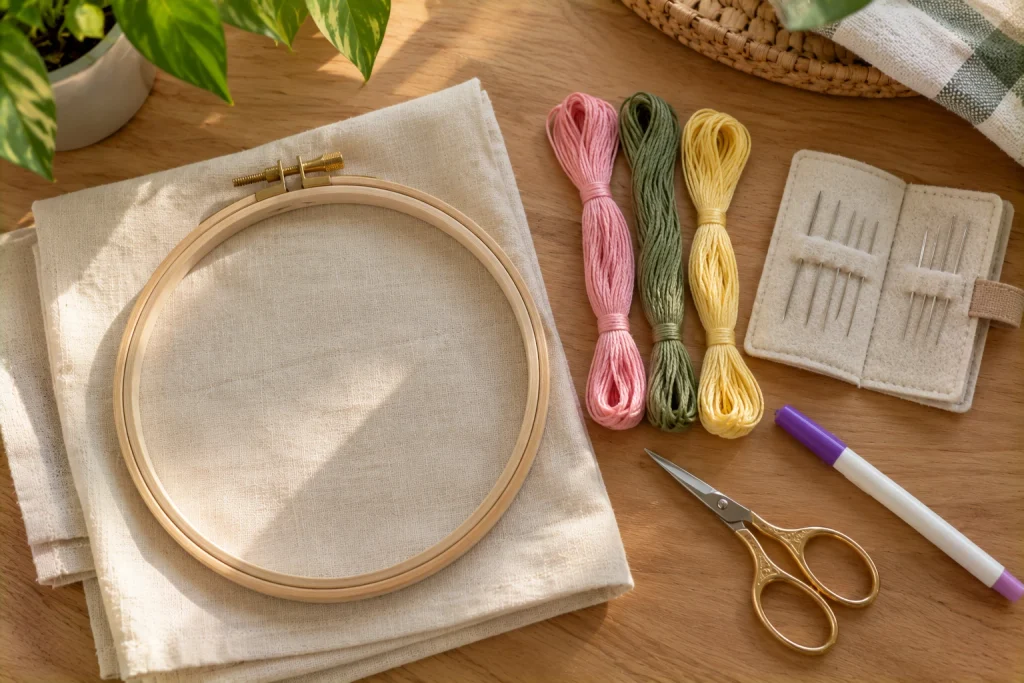
| Supply | Beginner choice |
|---|---|
| Hoop | A 6 inch (15 cm) wooden or plastic hoop |
| Fabric | Medium-weight woven cotton or linen-cotton, cut about 10 x 10 inches (25 x 25 cm) for a 6 inch hoop |
| Needle | An embroidery (crewel) needle, around size 5–7, with an eye large enough for three strands |
| Thread | Six-strand cotton embroidery floss in one to three colors |
| Tools | Small sharp scissors, a pincushion or needle minder, a removable fabric marker |
A 6 inch hoop is the size I’d recommend for a first project: big enough to work comfortably, small enough to hold in one hand. A Caydo embroidery hoop set (paid link) includes several sizes if you want options for later; for this project you only need one, so use a hoop you already own if you have one. The hoop holds the fabric but doesn’t include fabric, needles or thread.
For a changing-color effect, the DMC variegated embroidery floss pack (paid link) is one option. Variegated thread shifts shade along its length, so choose a solid floss if you want even color.
Test your marker on a scrap and follow its removal instructions before marking the sampler. Some marks become permanent after heat or ironing.
Plan a simple sampler layout
Draw a square border about 4 inches (10 cm) wide in the middle of the fabric so it sits comfortably inside a 6 inch hoop. Inside it, draw one curved stem with five small petal shapes at the top, leaving space between the flower and the border. Each part uses one stitch:
- Border: running stitch.
- Stem: backstitch.
- Petals: detached chain stitch, also called lazy daisy.
Leave the flower center empty for this first piece. Filled petals, textured leaves and raised centers can come later. If you’d like to try leaf shapes on paper first, the leaf exercise in this watercolor guide for beginners is a relaxing warm-up.
Put the fabric in the hoop without distorting it
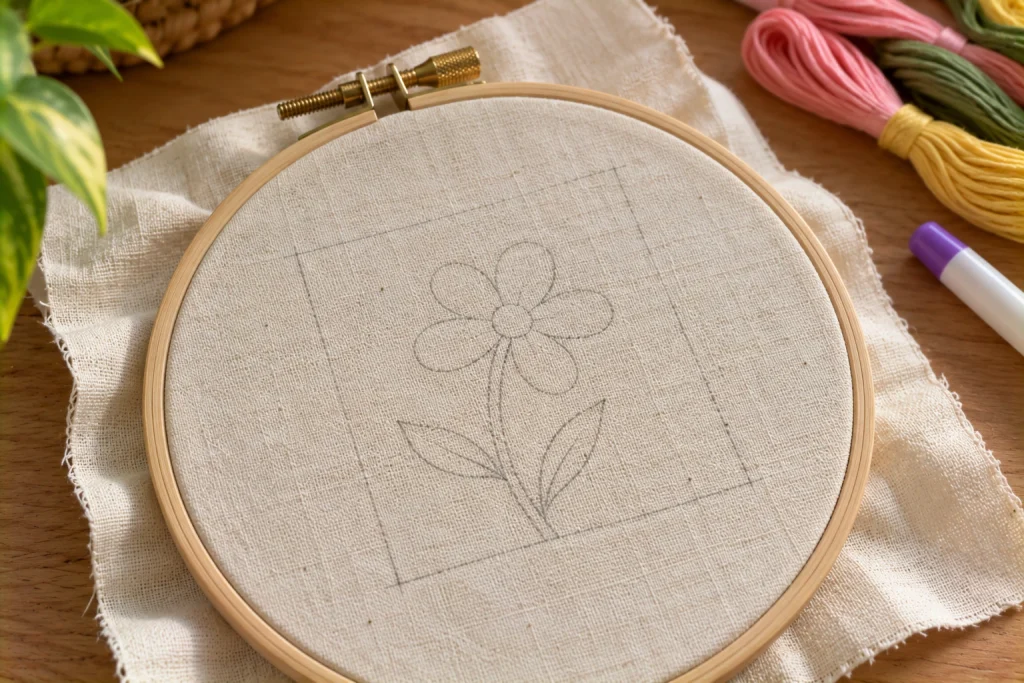
- Loosen the screw and separate the two rings.
- Lay the fabric over the inner ring with the design centered.
- Press the outer ring down over it and tighten the screw a little at a time, smoothing the fabric evenly all the way around.
The fabric should feel taut like a drum without the weave being pulled into curves. If you see the threads bending, loosen and reposition. Pulling hard on one side can make the design change shape when the hoop comes off. If the fabric slackens while you stitch, pause and retighten instead of pulling the thread tighter to compensate.
Prepare the floss and start the thread
Standard embroidery floss is made of six thin strands twisted together. For this sampler, use three strands, which give a visible line without being bulky. Cut a piece about 16–18 inches (40–45 cm) long; longer lengths tangle and wear out as you stitch.
Pull out one strand at a time from the cut end while holding the rest loosely, then put three strands back together and thread them through the needle. Leave a short tail rather than knotting both ends together, which would double the thickness. DMC’s floss preparation guide shows the separation step.
To start cleanly, tie a knot at the long end and push the needle down through the front of the fabric about 3 inches (8 cm) away from your starting point, outside the design. This “away knot” holds the thread temporarily. Stitch your line, then later cut off the knot, thread the loose tail and weave it under the stitches on the back. DMC’s guide to securing embroidery thread shows this and other starting methods.
1. Running stitch for a dashed border
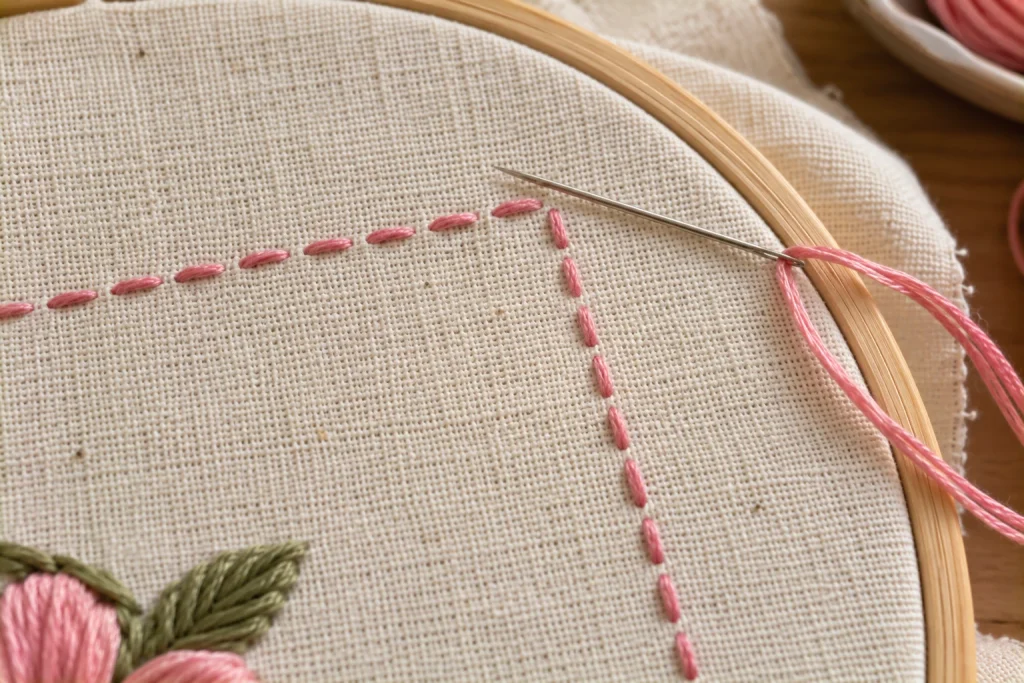
Running stitch makes a line of separate dashes. Aim for stitches about 1/8 inch (3 mm) long with gaps about the same size.
- Bring the needle up at the start of the border.
- Go down one stitch length further along the line.
- Come up again one gap length further on.
- Repeat, pulling the thread through gently each time.
Focus on even spacing before trying to make stitches tiny. Honestly, even beats small every time. An even rhythm looks intentional even if it isn’t machine-perfect. At corners, make the last stitch end exactly at the corner so the turn looks crisp. Turn the hoop as you go instead of twisting your wrist. If the fabric puckers, remove that section and restitch it with a gentler pull.
2. Backstitch for a continuous stem
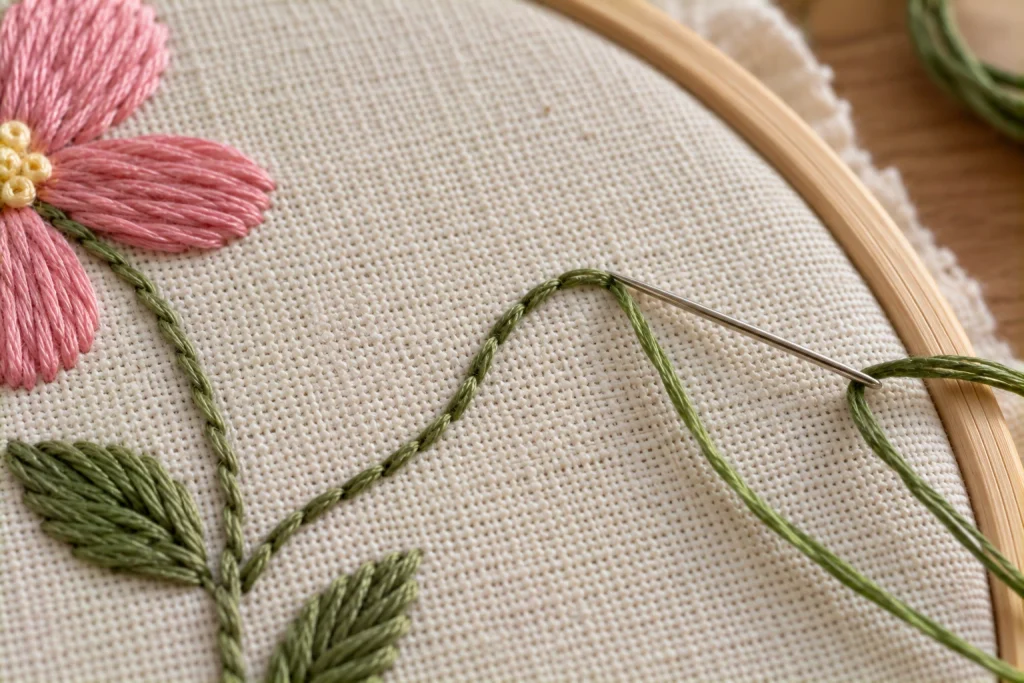
Backstitch joins short stitches into a solid line. Each stitch goes backward to meet the previous one, while the line grows forward.
- Bring the needle up one stitch length ahead of the start of the stem.
- Go down at the very start, making the first stitch.
- Come up one stitch length ahead of the end of that stitch.
- Go down into the same hole where the previous stitch ended.
- Repeat along the line.
Shorten your stitches around tighter curves, to about 1/16 inch (2 mm). A long straight stitch can’t follow a sharp bend and leaves visible corners. Check the back now and then for loops or knots, and stop if you feel unusual resistance rather than yanking the thread.
3. Detached chain stitch for petals
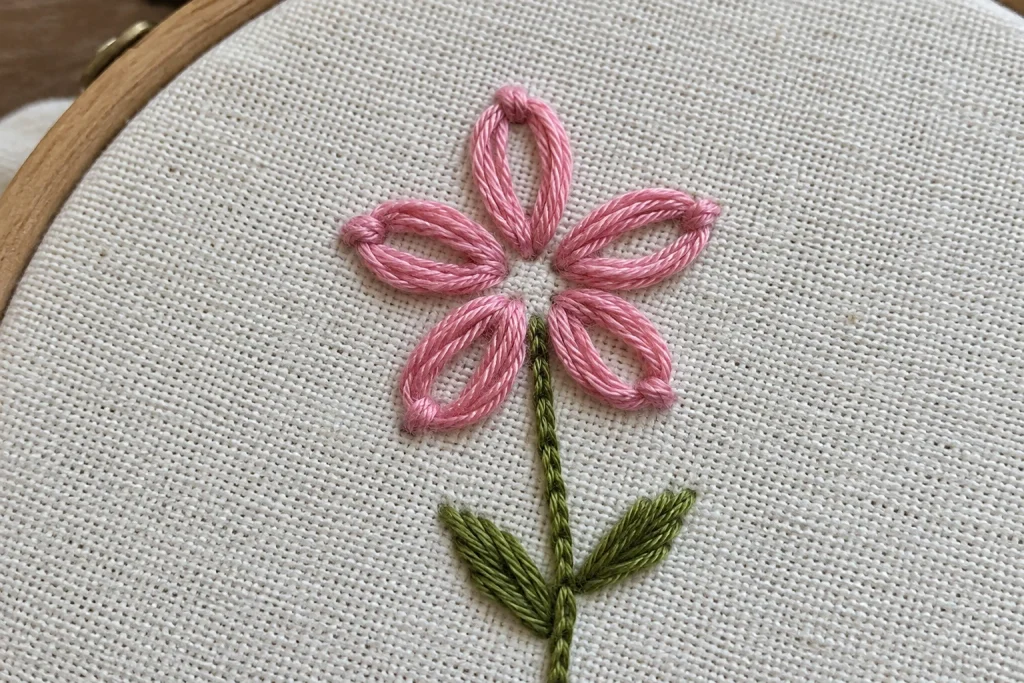
Detached chain, or lazy daisy, makes a single loop held down at its tip. Each loop becomes one petal.
- Bring the needle up at the base of the petal, near the flower center.
- Go back down into the same hole, but don’t pull the thread all the way through; leave a small loop on the surface.
- Bring the needle up at the tip of the petal, inside the loop.
- Pull gently until the loop sits snugly around the needle, keeping its sides rounded.
- Go down just outside the loop’s tip to make a tiny stitch that holds it in place.
This is the stitch most beginners enjoy once it clicks. Repeat it five times around the center. Practice one or two loops on the edge of the fabric first. The petals don’t need to match exactly; a balanced group matters more than identical loops.
Fix problems before adding another stitch
| Problem | What to try |
|---|---|
| Fabric puckers | Unpick the tight stitches, retighten the hoop evenly and stitch with a lighter pull |
| Thread twists and knots | Let the needle hang freely for a moment to untwist; use a shorter length |
| Gaps in backstitch | Go back down into the exact hole where the last stitch ended |
| Petal loop pulls flat | Hold the loop with your thumb while bringing the needle up inside it |
| Needle hard to pull through | Check the back for tangles; try fewer strands or a slightly larger needle |
Finish and display your sampler
When a thread ends, weave it under four or five nearby stitches on the back and trim it, leaving no long tails to catch. The back doesn’t have to look like the front, but it should be reasonably tidy. Remove marker lines according to the marker’s instructions before ironing anything, since heat can set some marks.
To display it in the hoop, trim the extra fabric to about 1 inch (2.5 cm) beyond the hoop, then run a gathering stitch around the edge and pull it tight at the back. For grouping hoops on a wall, see this no-sew fabric wall art tutorial; one embroidered hoop beside two fabric hoops makes a simple display.
Keep your first sampler, even if it’s wonky. It’s a nice record of where you started. For the next project, reuse the same three stitches in a new arrangement, such as a sprig of flowers or an initial, before buying a complicated kit.
Stitch demonstrations
For photographed needle positions, the Royal School of Needlework’s Stitch Bank has clear tutorials for running stitch, backstitch and detached chain stitch.