Watercolor for beginners becomes less intimidating when you start with a small set of materials and one manageable page. You do not need to paint a landscape immediately. Begin by learning how much water your brush holds, how colors mix, and what happens when a wet mark touches a dry one.
Set up on a table where you can leave the paper flat while it dries. A compact working area is enough for the three projects below, and you can pack the supplies away between sessions.
This article contains affiliate links. As an Amazon Associate I earn from qualifying purchases.
Buy less paint and choose suitable paper
The Winsor & Newton Cotman Sketchers’ Pocket Set (paid link) is one compact paint option to consider. Check the current set contents before buying. You will still need watercolor paper, clean water, and a cloth or paper towel, and you may prefer a larger round brush for broad practice shapes.
If you already have a basic watercolor set, begin with that. The early exercises depend more on noticing water and timing than on owning many colors. A large collection can make it harder to learn which mixtures you enjoy.
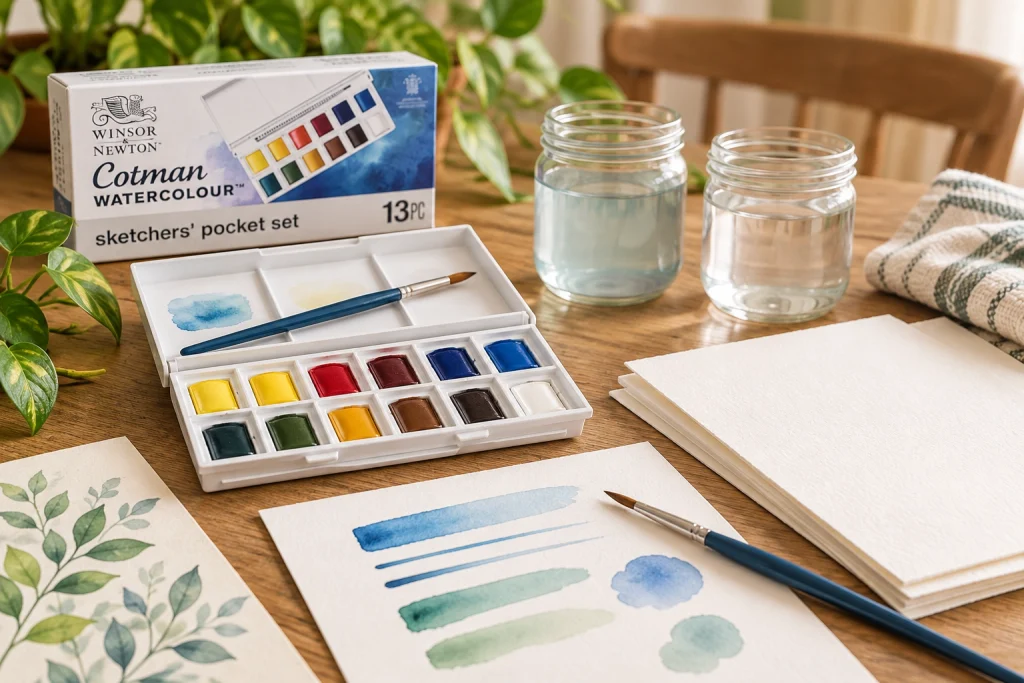
Use paper intended for watercolor rather than ordinary printer paper. Heavier watercolor paper, such as paper labeled around 140 pounds or 300 grams per square meter, is a practical starting point. It can still move or buckle when wet, so do not assume the weight makes it perfectly flat.
Put out two water containers if space allows: one for the first rinse and one for cleaner water. Keep art containers separate from drinking cups. Protect the table and follow the paint’s handling and cleanup instructions.
Before starting a project, make a few practice marks on an offcut. Wet the brush, touch it to paint, and draw a short line. Blot the brush once and try again. Those two marks show you how a small change in water affects the result.
1. Paint a color-mixing grid
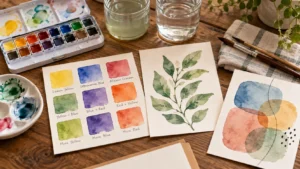
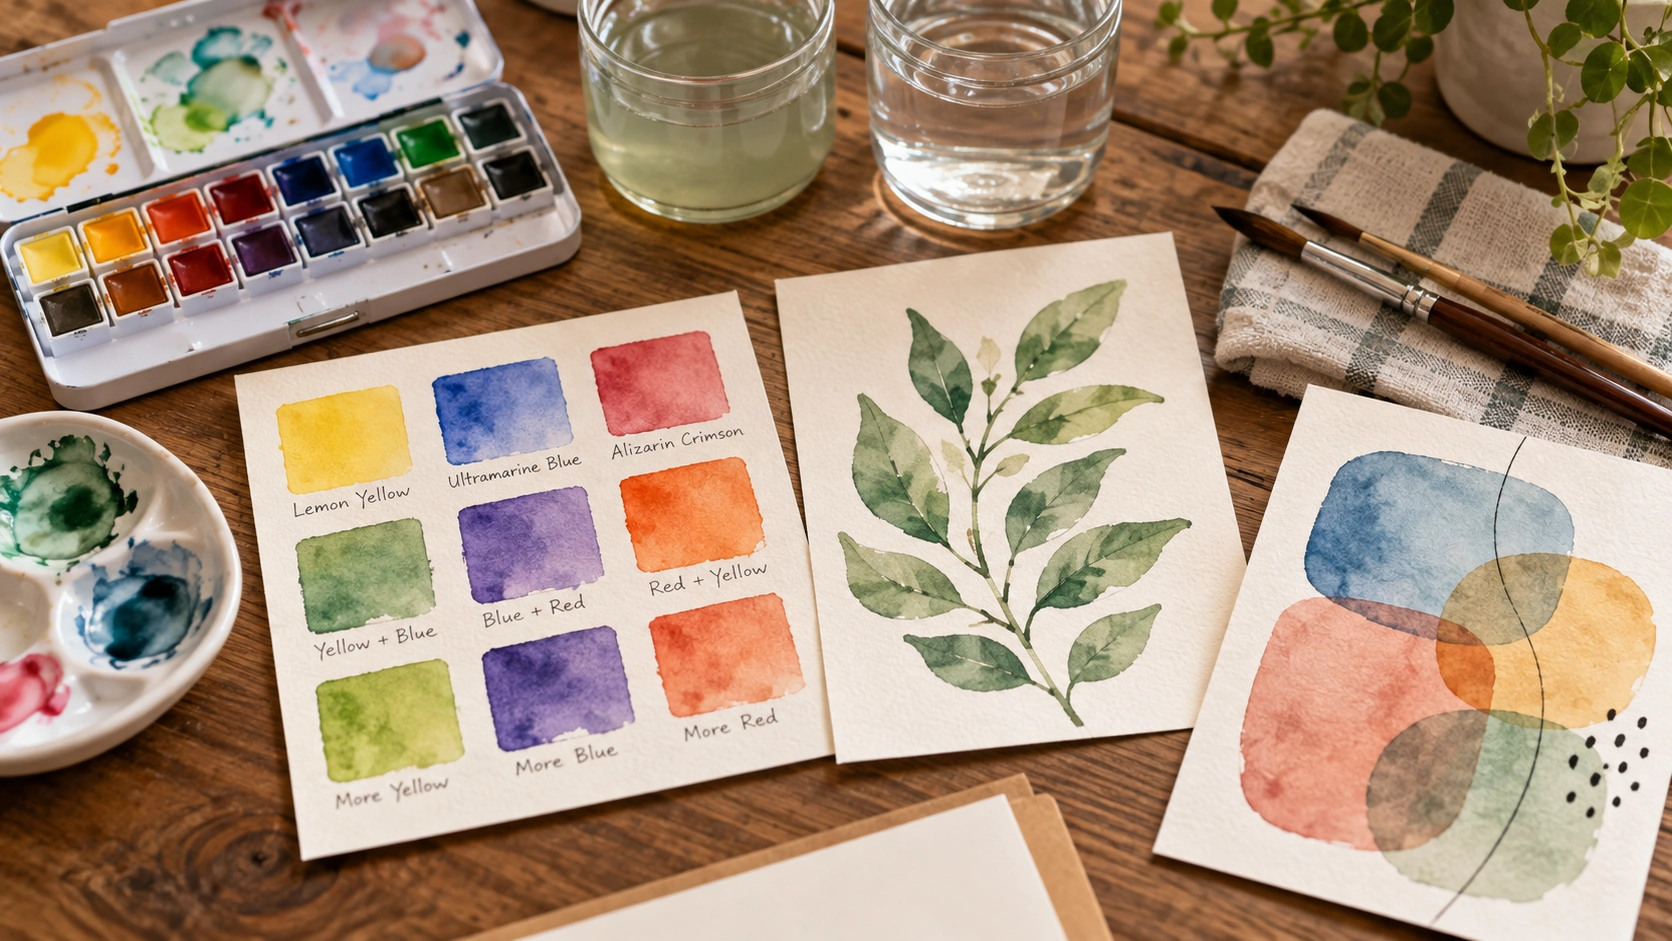
Draw a loose grid with nine spaces on a small sheet. Choose three colors you like, such as a yellow, a blue, and a red from your set. The point is to observe those specific paints, not to produce a universal color chart.
Across the first row, paint each color on its own. Use enough water for the paint to move, but avoid leaving a deep puddle. Let these first squares show the character of the colors you chose.
In the next row, mix pairs on your palette before applying them. Try yellow with blue, blue with red, and red with yellow. Rinse between mixtures so leftover paint does not change every result in the same direction.
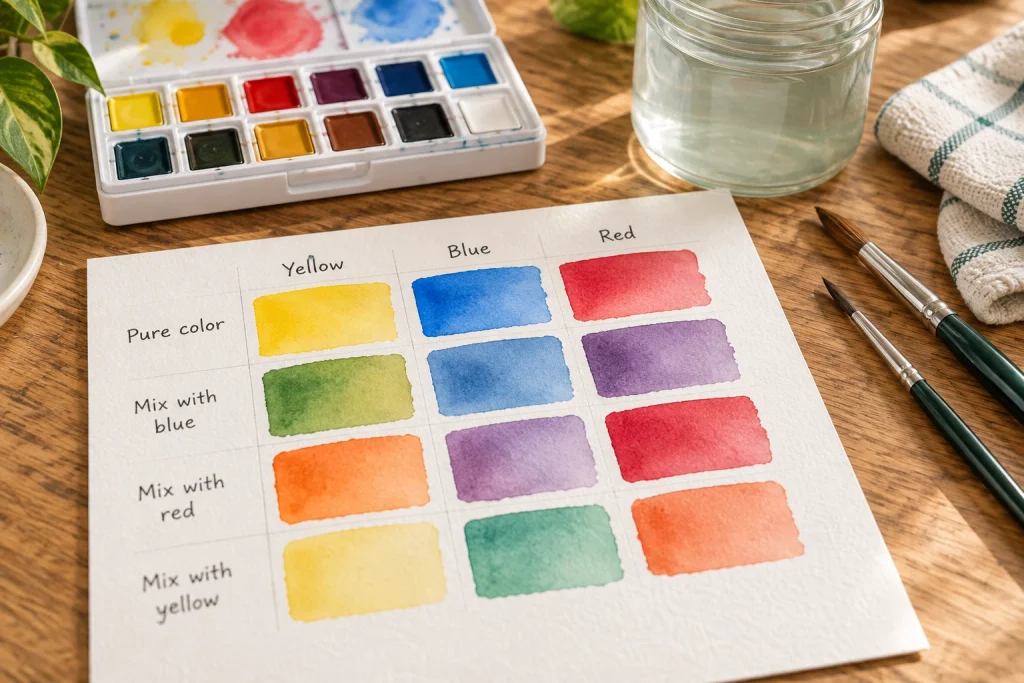
In the final row, repeat the mixtures with a different balance. Add more yellow to one green, more blue to one purple, and more red to one orange. You will start to see that a mixture is a range rather than a single fixed color.
Label the page lightly once it is dry. Write the color names or a simple description beside the mixtures. Keep the sheet near your supplies so you can refer to it during the next project.
If a mixture looks muddy, clean the palette and try again with only two colors. This makes it easier to identify what changed. Save the result even if it is not pretty; an honest practice sheet is more useful than a perfect-looking chart you do not understand.
2. Paint a page of simple leaves
Choose one green mixture from your grid. Draw a light curved stem, or paint the stem with a small brush if you prefer. Keep the composition loose enough that you can place leaves on either side without following a rigid pattern.
For each leaf, begin with the tip of a damp brush, press gently to widen the mark, then lift back to the tip. Practice the movement on a scrap first. A pointed leaf shape often comes from changing pressure rather than outlining and filling every edge.
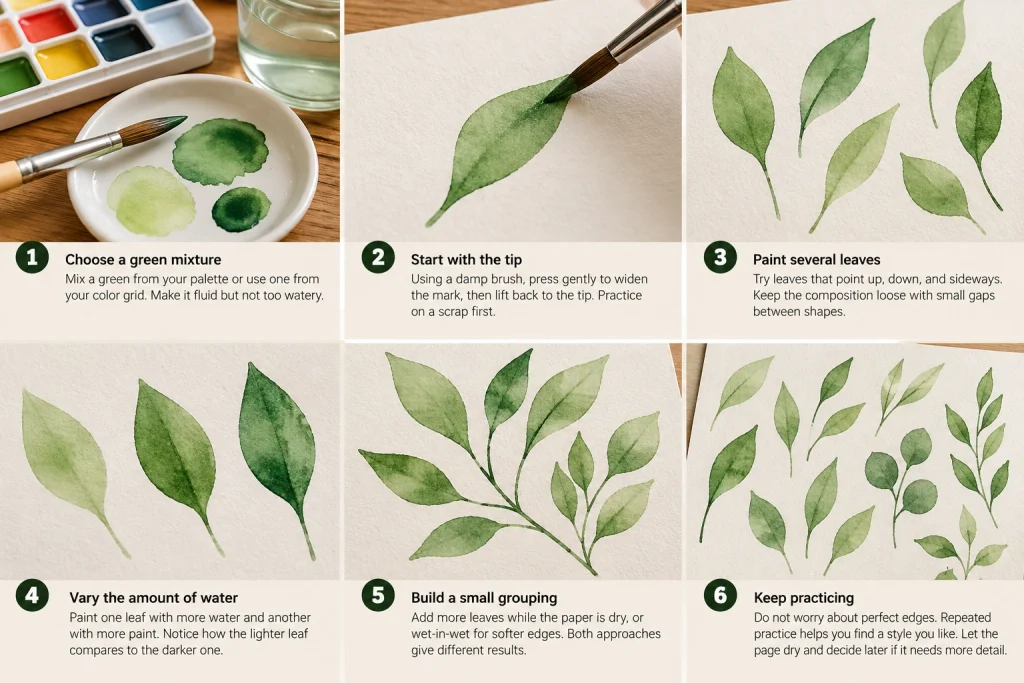
Alternate the direction of the leaves. Let some point upward and others lean outward. Leave a little white space between shapes so the page does not become one continuous patch of green.
Try one leaf with more water and another with more paint. Notice how the lighter leaf relates to the darker one. You can create variation without mixing a new color for every mark.
Wait for the first layer to dry before adding darker details if you want those details to stay distinct. If you add them while the surface is wet, the color may spread. Both effects can be useful, but they create different results.
Do not keep brushing a leaf simply because its edge is uneven. Repeated scrubbing can disturb the paper and make the shape less clear. Move on, let it dry, and decide later whether it needs anything else.
3. Make an abstract postcard with overlapping shapes
Cut or choose a small piece of watercolor paper and select two colors that looked appealing on your mixing grid. Paint three loose shapes, leaving space between them. They can be circles, rounded rectangles, or irregular forms.
Let the first shapes dry fully before placing a second group partly over them. Where a transparent layer overlaps an earlier one, you can see a different depth of color. This is a simple way to explore layering without drawing a complicated subject.
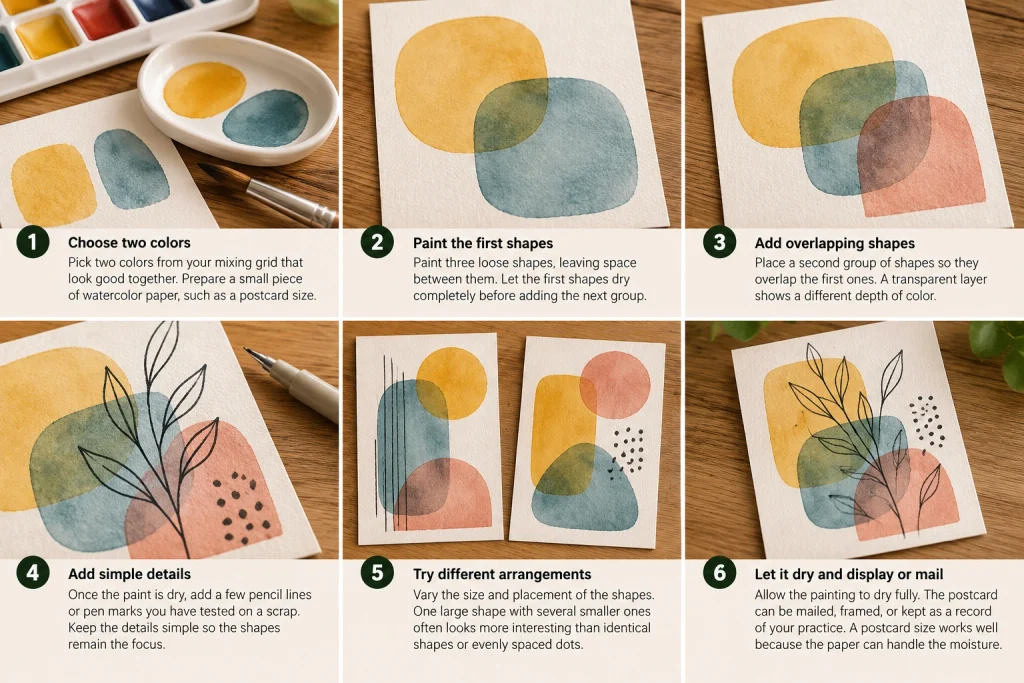
Vary the size of the shapes. One larger shape and several smaller ones often create a more interesting arrangement than identical dots spread evenly across the page. Keep an area of untouched paper so the composition has room to breathe.
After the watercolor is dry, you can add a few pencil lines or marks with an appropriate pen you have tested on a scrap. Keep this optional. The painting does not need a decorative outline to count as finished.
If you want to mail it, protect the artwork in an envelope rather than assuming the painted surface will tolerate moisture or postal handling. You can also display it on a desk as a record of your first session.
Use each practice page to decide what to try next
These watercolor projects for beginners give you three different ways to practice with the same supplies. Look at the dry pages together. Find one mark you like and describe why: a pale edge, a soft color transition, a leaf shape, or a clear overlap. Choose that specific effect for your next session instead of trying to improve everything at once.
Notice one practical problem too. If the brush ran dry immediately, try a little more water. If every shape formed a puddle, blot the brush before touching the paper. If colors mixed unintentionally, allow more drying time between neighboring areas.
Write the date on the back and keep the pages. After several sessions, you will have visible examples of what your materials do. That small collection makes it easier to choose another project and gives you a better reason to buy an extra brush or color when you actually need one.