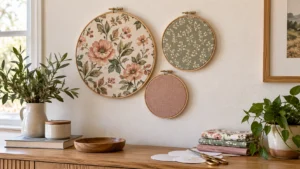
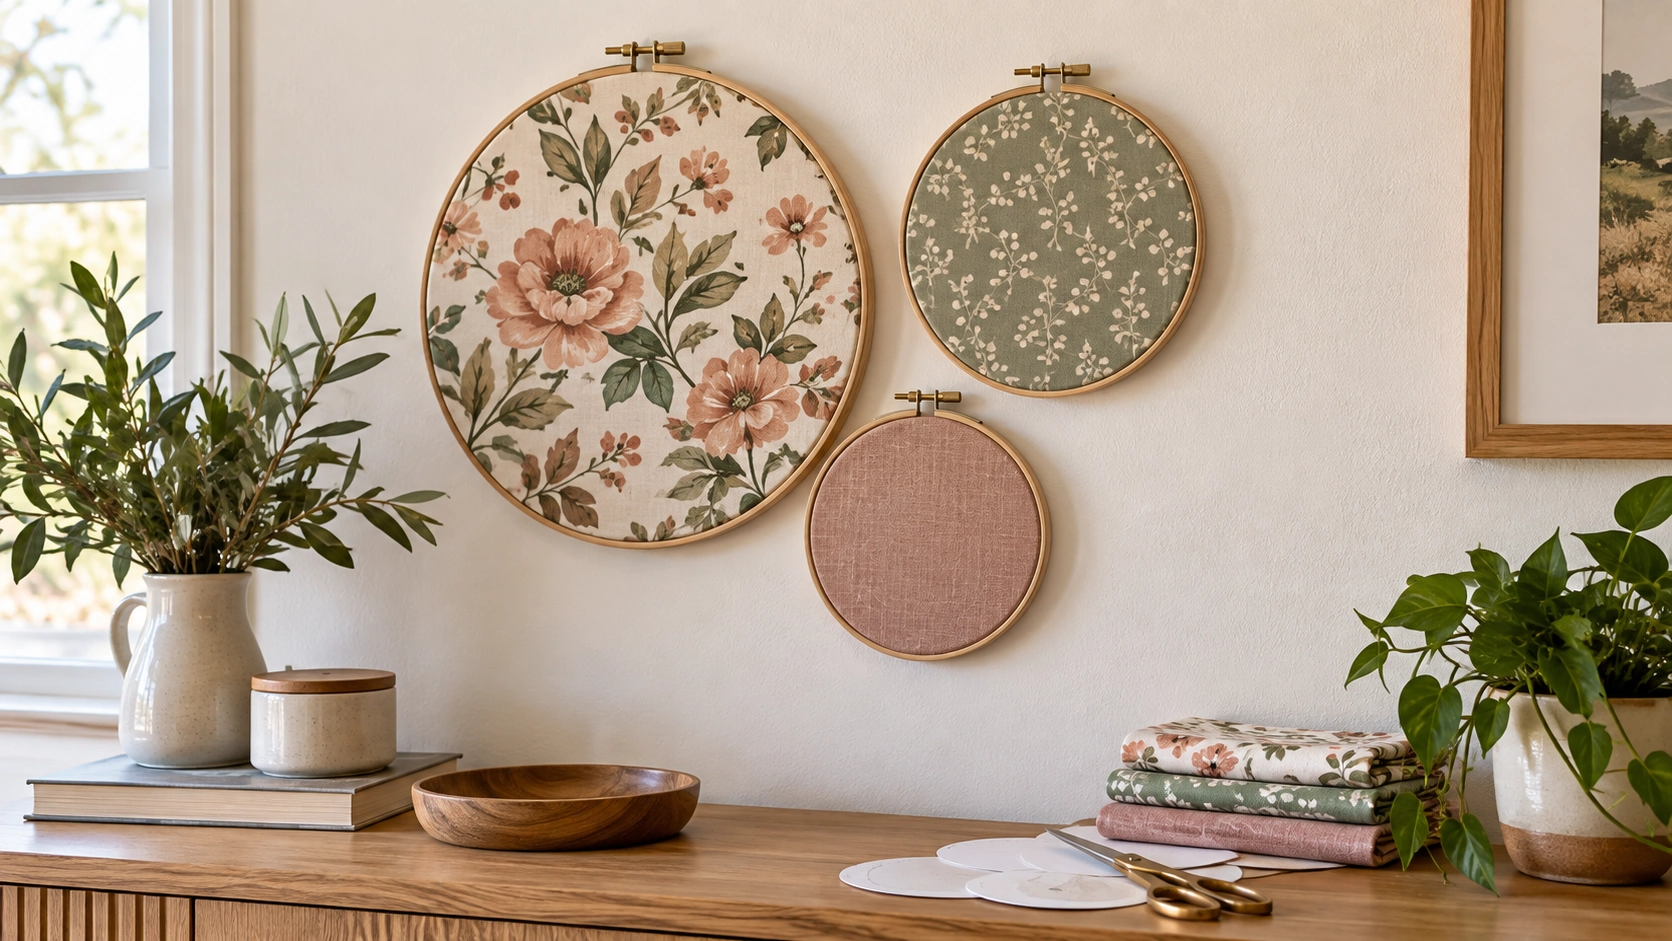
No-sew fabric wall art is a practical way to use a fabric remnant you love but cannot turn into a cushion or curtain. Stretching fabric in embroidery hoops gives it a simple frame. A small group can add pattern to an empty wall without requiring sewing skills or a large canvas.
For a first project, make three hoops that share one color. Use a larger print as the main piece, a smaller pattern beside it, and a solid or lightly textured fabric to give your eyes somewhere to rest.
This article contains affiliate links. As an Amazon Associate I earn from qualifying purchases.
Choose hoops and fabric that work together
A Caydo bamboo embroidery hoop set (paid link) offers several sizes for trying this arrangement. The linked six-piece set ranges from four to ten inches. You only need three hoops for the project, so use hoops you already own if their condition and size suit the fabric.
Gather fabric scraps, fabric scissors, an iron if the fabric permits ironing, a pencil, paper for wall templates, and optional fabric-compatible craft adhesive for securing the back. Follow the adhesive instructions and test it on an offcut before using it on visible fabric.
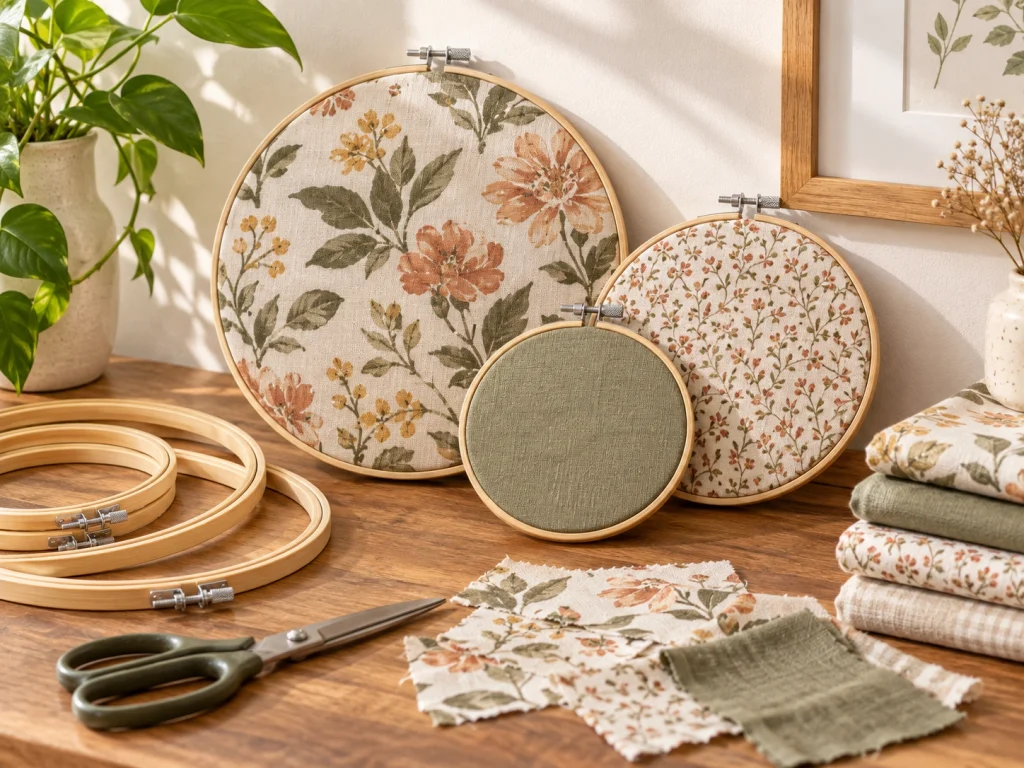
Choose a woven fabric that holds its shape reasonably well. Very stretchy knit fabric can distort, and a thick upholstery fabric may be difficult to clamp in a small hoop. Thin fabric can work, but check whether the wall color shows through it.
Wash or prepare fabric according to its care requirements if needed, then let it dry. Press out creases before framing when the care label allows. A deep fold through the center of the finished hoop is more noticeable than you might expect.
Avoid cutting a valuable textile or sentimental garment until you have practiced with an ordinary scrap. This project may involve trimming and adhesive, so it is not an archival preservation method.
1. Find the best section of each fabric
Separate an embroidery hoop into its inner and outer rings. Lay the outer ring over the fabric like a viewing window and move it until you find an attractive section of the print.
For a floral fabric, try placing one flower slightly off-center. For stripes, decide whether you want them vertical, horizontal, or deliberately diagonal. Check the direction before cutting because a crooked stripe is difficult to ignore after the hoop is tightened.
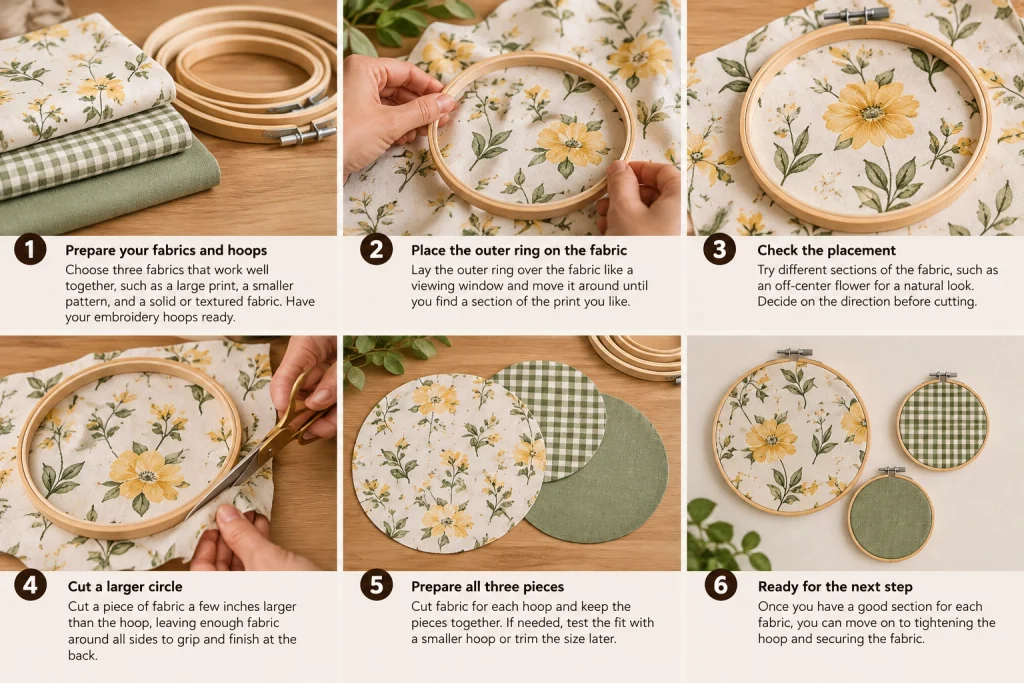
Cut a piece larger than the hoop, leaving enough fabric around every edge to grip and finish at the back. An extra couple of inches around the circle is a helpful starting allowance, but the amount you need depends on hoop size and fabric thickness.
Keep the offcuts until the project is finished. They are useful for testing adhesive or experimenting with a smaller hoop later. Do not trim close to the frame while you are still deciding on the composition.
Lay all three fabric pieces beside each other. If they compete, change the smallest one first. Replacing a second large print with a quiet texture often makes the group feel more connected.
2. Stretch each piece evenly in its hoop
Place the inner ring flat on the table. Lay the fabric over it with the chosen section centered, then fit the outer ring over both. Loosen the screw enough that the pieces fit without forcing the fabric or bending the ring.
Tighten the screw a little, then gently adjust the fabric around the edges. Work around opposite sides rather than pulling hard in one direction. This helps maintain the print’s shape and spreads the tension more evenly.
Check the front repeatedly. The surface should look smooth, but it does not need to be stretched so tightly that the weave distorts. If a flower looks elongated or a stripe curves, release some tension and reposition the fabric.
Keep the screw at the top if you want the hoops to look consistent. You can use that position as a visual guide when arranging them later. Tighten according to the hoop’s construction without overtightening or damaging the screw.
Set the hoop upright briefly and look at it from the distance where it will be viewed. A tiny wrinkle that disappears from across the room may not need further adjustment. Fix the obvious folds and keep moving.
3. Finish the backs without stitching
Turn a finished hoop face down on a clean surface. Trim excess fabric only after you are happy with the front, leaving a manageable allowance to fold behind the inner ring.
For a no-sew finish, apply a small amount of compatible craft adhesive where the fabric will attach to the back of the ring. Follow the product’s application and drying directions. Keep adhesive away from the front and avoid soaking the fabric.
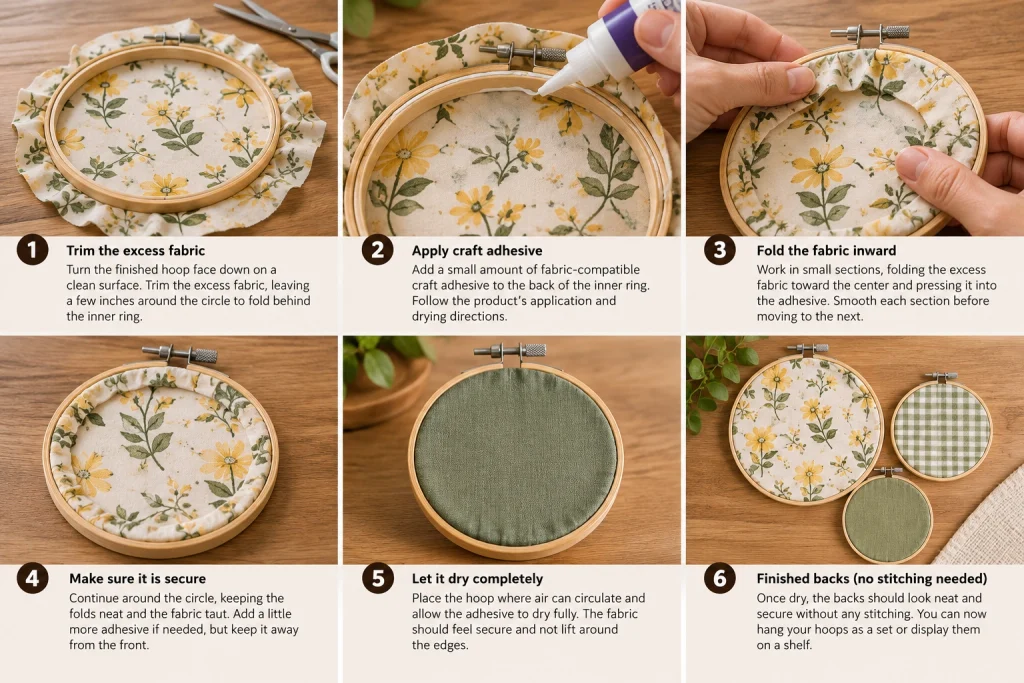
Fold the allowance inward gradually around the circle. Work in small sections, smoothing each one before moving on. Thick folds can make the hoop stand away from the wall, so trim excessive bulk cautiously while preserving enough fabric to hold securely.
If you want a removable arrangement, you can leave a neatly trimmed allowance tucked behind the hoop instead of gluing it. Check that the fabric stays secure and does not peek around the edges. This works better with some fabrics than others.
Let any adhesive dry completely before hanging. Place the hoops where air can circulate and where the drying fabric will not stick to a table or another project.
4. Arrange the display with paper templates
Trace the hoop sizes onto paper and cut out the circles. Use a wall-safe temporary method to test the arrangement, checking suitability for your wall finish first. Paper is easier to move than finished art.
Start with the largest hoop slightly above or beside the others. Keep the gaps visually related rather than trying to align every edge. A compact group generally reads as one display, while very wide spacing can make each small hoop seem isolated.
Look at the arrangement from the doorway and from your usual seat. Adjust it in relation to the furniture below, not just to the center of the wall. A group above a desk should feel connected to the desk’s usable area.
Use mounting suitable for the finished weight and wall surface, following the hardware instructions. Keep fabric art away from open flames, heaters, direct splash, and locations where it could fall onto a sleeping or seated person.
Change the fabric before you change the whole room
This no-sew fabric wall art is easy to coordinate with existing colors. Pull one shade from a cushion, curtain, or rug and repeat it in the display. The patterns do not need to match exactly to feel related.
If the room already contains several prints, make two hoops plain and let one carry the pattern. If the room feels sparse, a larger print can supply more personality without adding objects to your shelves.
Dust the finished pieces gently in a way appropriate for the fabric. Avoid wet cleaning while the textile is mounted unless you know how both the fabric and frame will respond.
When you want a different look, reuse the hoops where their condition allows. A small change in fabric can connect the display to a new cushion or favorite color. Keep the paper templates too, so you can adjust the arrangement without guessing where each circle belongs.